Why is this happening?
Procore recently made some changes to their system which includes de-commissioning all existing Service Accounts. These Service Accounts are currently being used to authenticate the integration with SALUS to give it the necessary access to your Procore instance to perform the actions needed.
As a result of this change all Procore integrations now need to be run through their App Marketplace and authenticated in a different way.
What is required of you?
With this update to our integration now in place there are a few changes you need to make within Procore to ensure there is no disruption to your SALUS/Procore Integration. This document will walk you through these steps.
Pre-requisites
- Procore Administrator privileges to execute configuration steps
- An existing and functional SALUS/Procore integration
Step 1 - Install SALUS Application
The first step to reconfigure your integration is to install the SALUS app in your instance of Procore.
- Log into Procore, click your “Company Tools” dropdown and navigate to “App Management”
- Click the orange “Install App” button in the top right corner and select “Install Custom App”
- Enter “942ce720-c74e-4644-a15c-e4b09c5ee700” for the App Version ID and click the orange “Install” button
- Click the orange “Install” button on the next dialogue box
- This dialogue box is a friendly reminder that you need to reach out to SALUS support to let us know that your configuration is complete. Note, that you need to complete all of the steps before doing so, at which time you can email support@salussafety.io
- Click the “Skip” button on this step. This screen only allows you to add one project whereas you need to add all projects at a later step
Step 2 - Permissions & Project Access
With the SALUS app now installed from the marketplace you now need to assign the correct permission templates as well as add SALUS to all of your current and future projects.
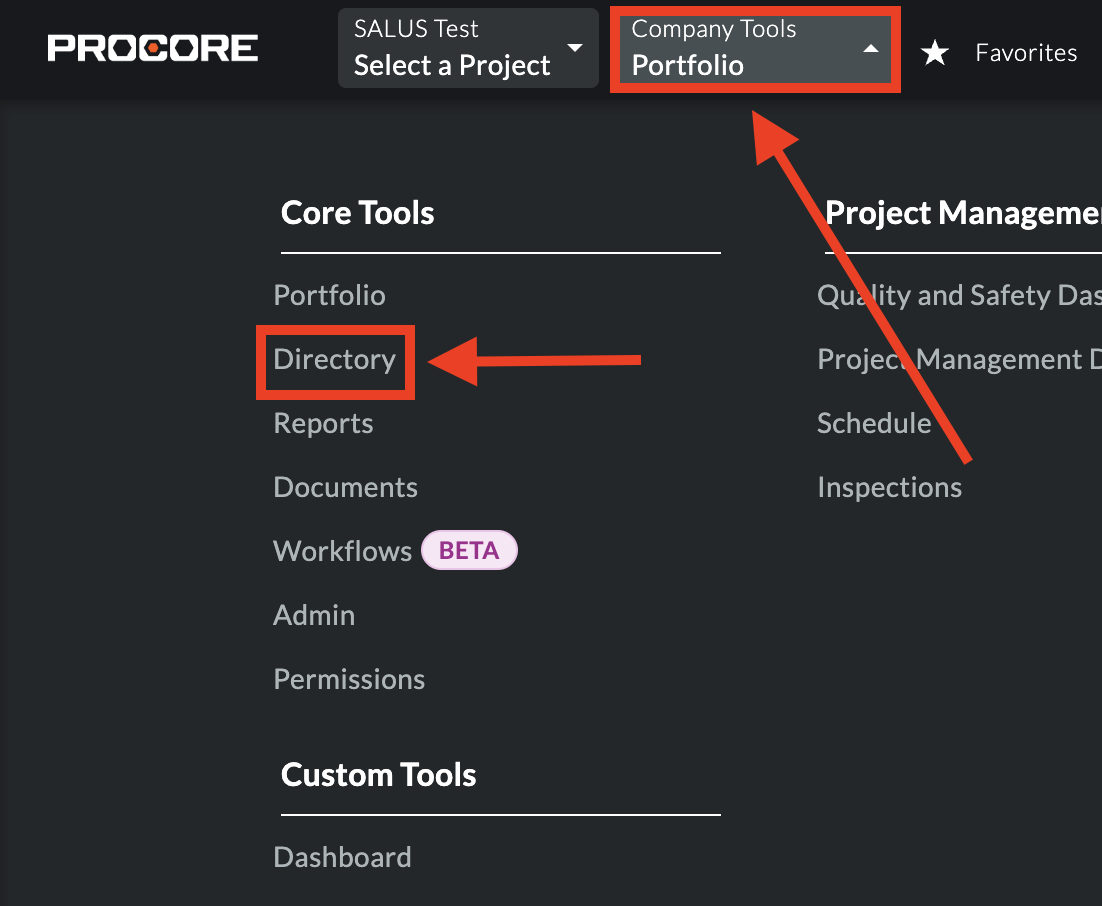
- Click on the “Company Tools” drop down and then on “Directory
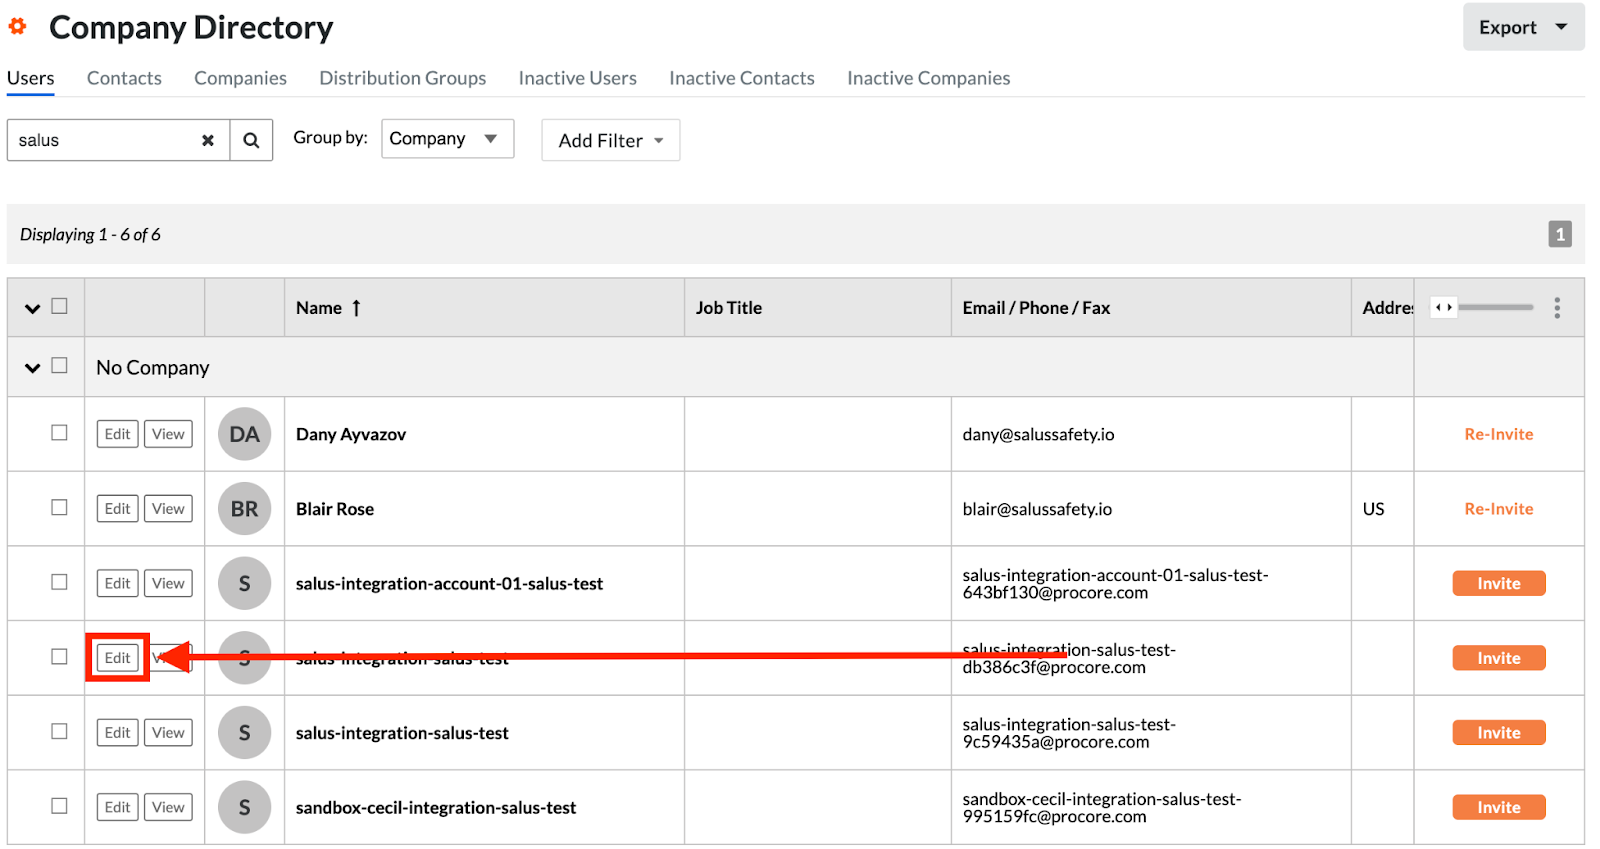
- Find the SALUS Integration Account in your directory and click the “Edit” button. The name of this account will be “salus-integration-xxxxxxxx”
- Scroll down to the “COMPANY PERMISSIONS TEMPLATES” section and select the “SALUS Integration Account” template from the drop down

- Scroll down to the “Project Settings” section. Check the box to allow for the service account to be added to all new projects in your company. Then click on “Select Default Template”
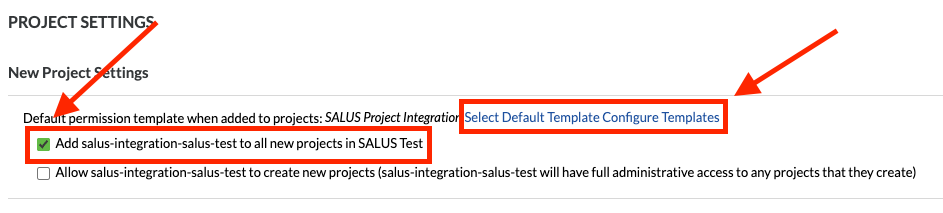
- Select “SALUS Project Integration from the Template dropdown and then click “Apply in the bottom right hand corner

- Next, scroll to the very bottom of the page and click the “Save” button
- Next, navigate back to the SALUS integration account and click the “Edit” button again
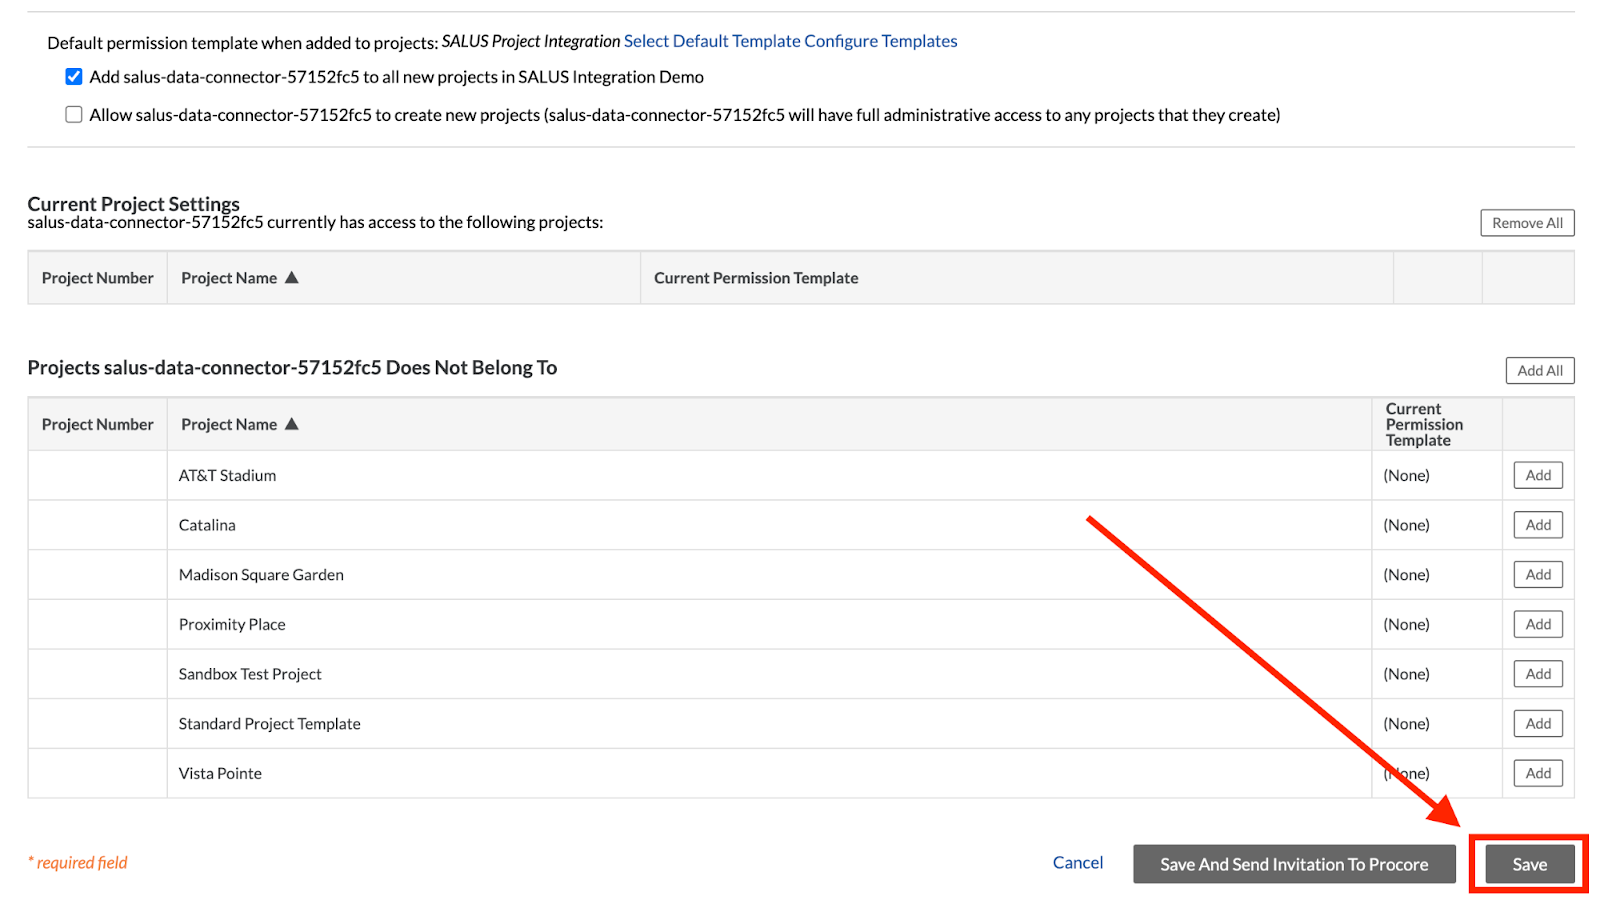
- Next, scroll down to the “Current Project Settings” and click the “Add All” button. This will give the account access to all projects currently in Procore
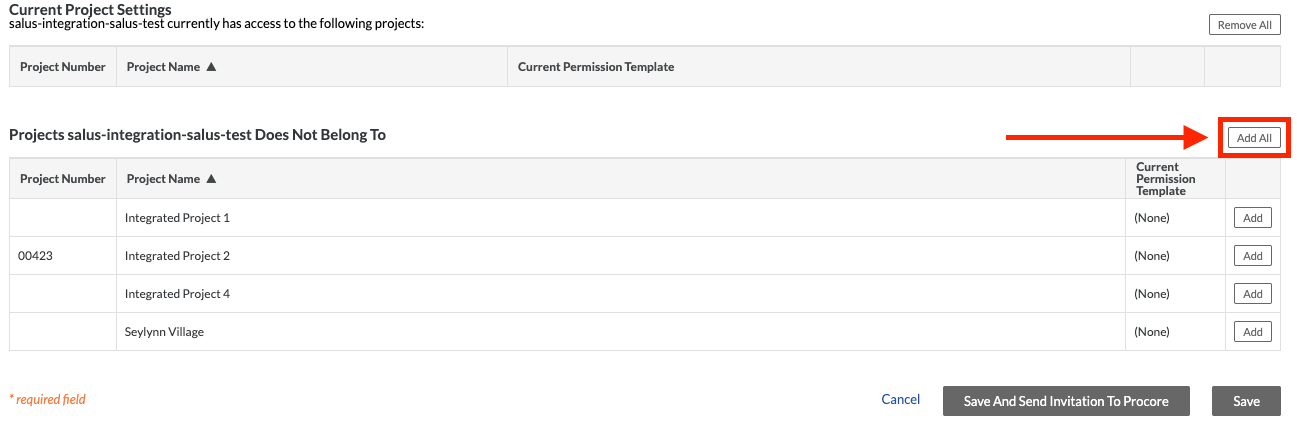
- Remember to click the “Save” button at the bottom of the page once the account has been added to all projects

- Don’t forget to contact our support team once you have finished all of these steps. You can email them directly at support@salussafety.io